Unreal Engine Inventory System Development Tutorial
Simply put, building a complete inventory system from scratch, including item pickup, stacking, and dropping
When working on a game project, I needed to implement an inventory system and researched how to do it in Unreal Engine. This article documents the complete process of building an inventory system from scratch, including data structure design, item pickup, stacking logic, and item dropping.
What is an Inventory System
An inventory system is a core feature in games for managing player items. It needs to handle item storage, stacking, usage, and dropping. A good inventory system should:
- Have clear data structures, easy to extend
- Support item stacking to save inventory space
- Have rigorous logic to avoid data synchronization issues
Step 1: Create Data Structures
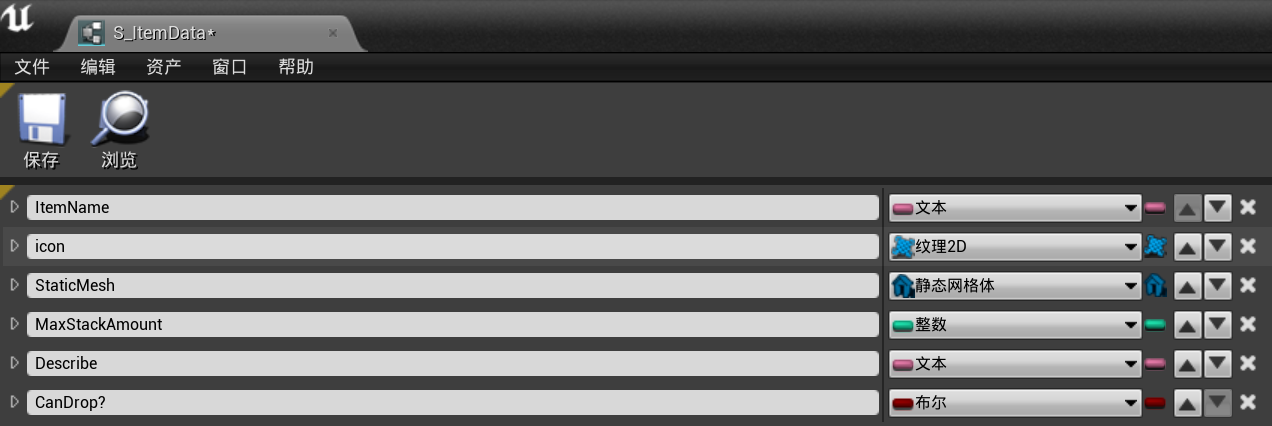
ItemData Struct
First, create a struct called ItemData to define basic item properties. It’s like an item template, not directly corresponding to specific item instances.
Recommended project structure:
Blueprints/Structs/- Store structsBlueprints/DataTable/- Store data tables
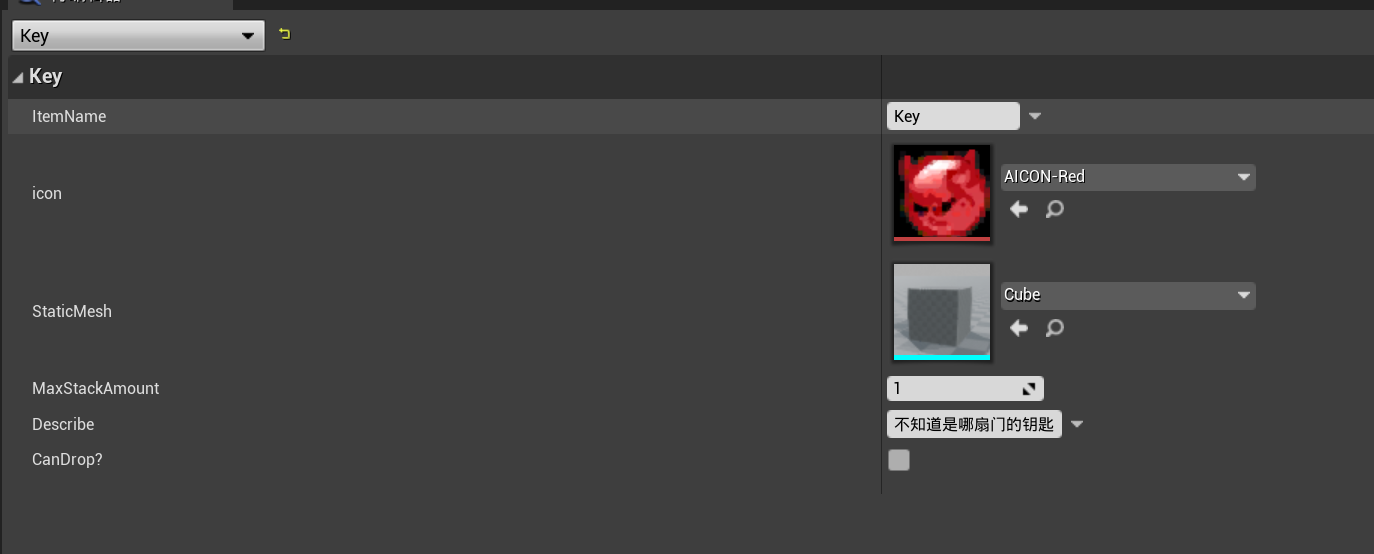
ItemData struct contains:
- Item name
- Item icon
- Item model
- Max stack size
- Item description
Create Data Table
Create a data table to store multiple items. Here using “Battery” and “Key” as examples:

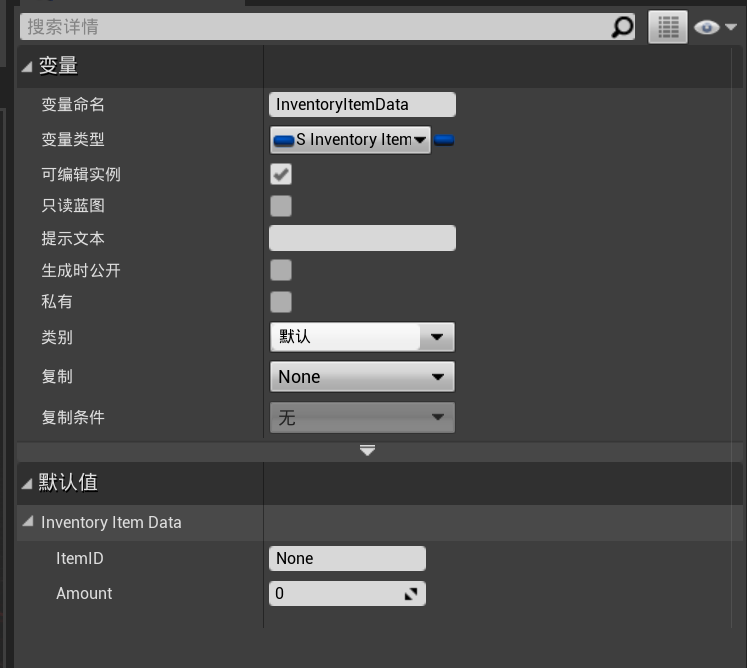
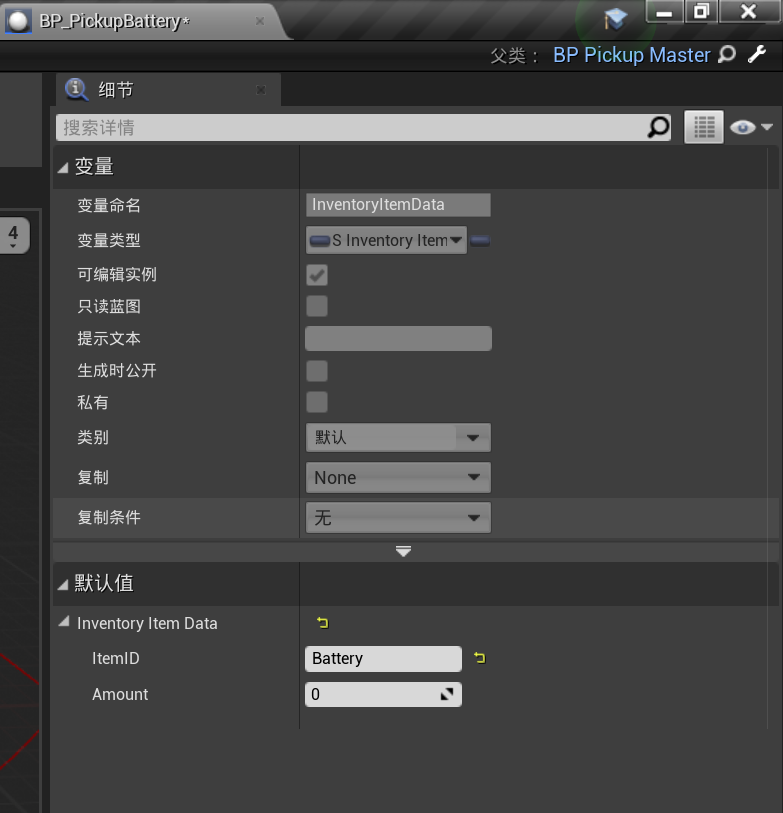
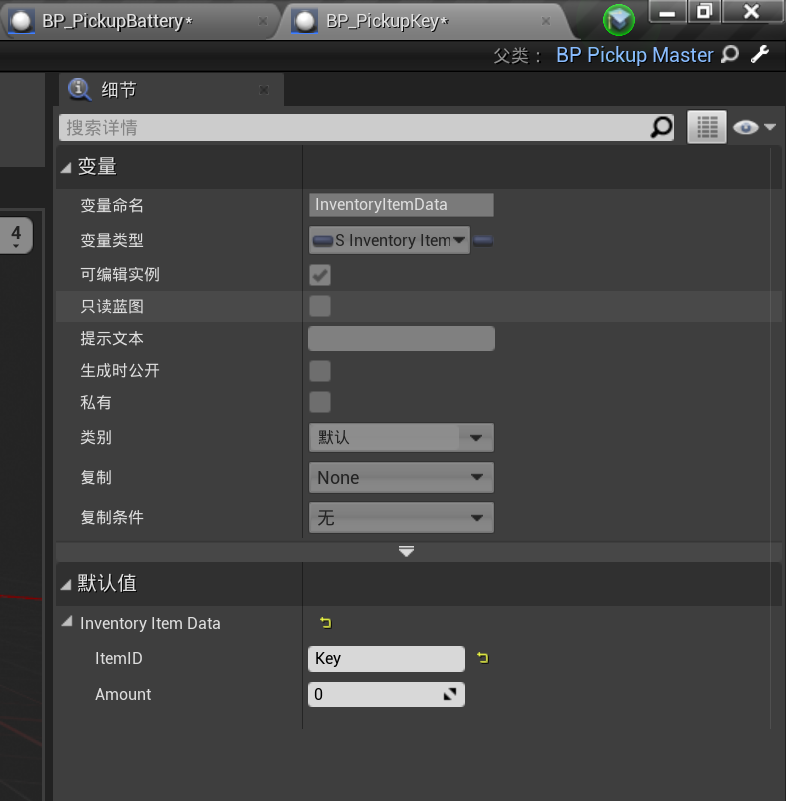
InventoryItemData Struct
Then create InventoryItemData struct, which is an instantiation of ItemData, containing:
- ItemID (Name type) - Used to find item info in data table
- Amount (Integer type) - Current stack quantity

Why two structs?
Can’t use ItemData directly to record inventory quantity because ItemData is a static template shared by all instances. If Amount is in ItemData, all players’ item quantities would be forcibly synchronized. For example, if one player picks up a battery, all players’ battery count becomes 1, causing serious logic confusion.
InventoryItemData records dynamic information of specific instances, linking to data table through ItemID to get static properties. It’s the data bridge between inventory component and UI.
Step 2: Create Pickupable Items
Create BP_PickupMaster blueprint class in Blueprints/PickupActor/ folder.
Add Variables
Add ItemID and Amount variables to store this pickupable instance’s data.
Constructor Logic
In constructor, access data table through ItemID, get item info and set static mesh model:
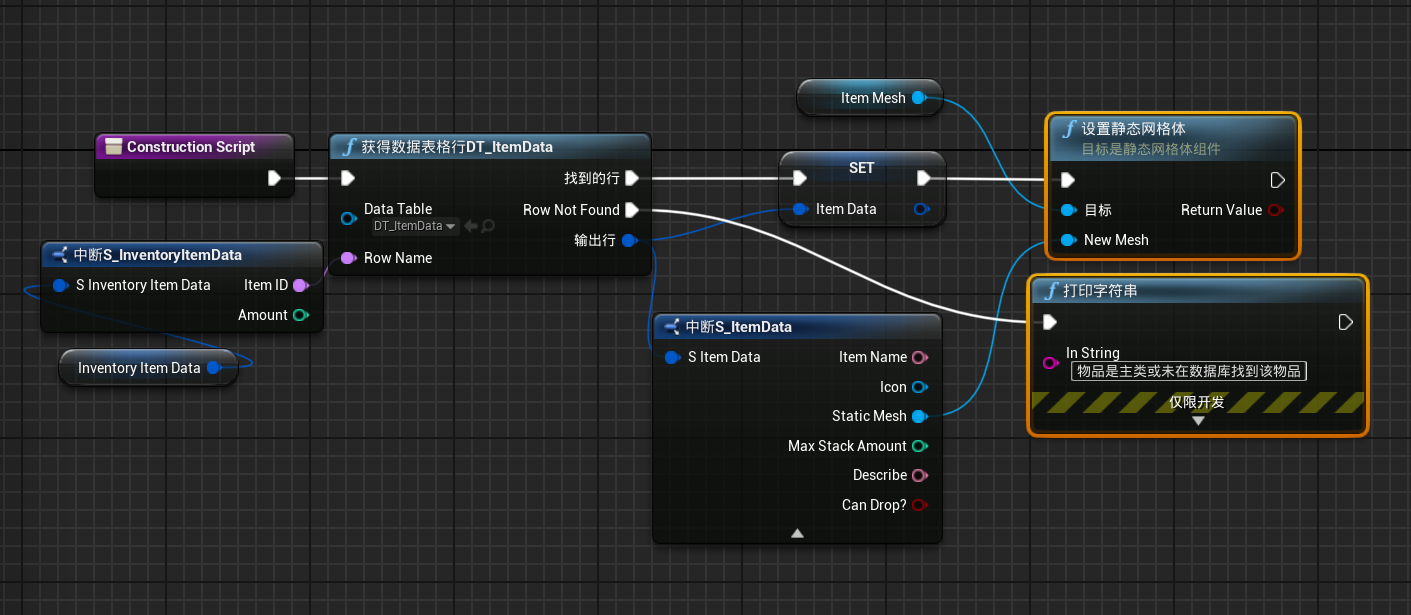
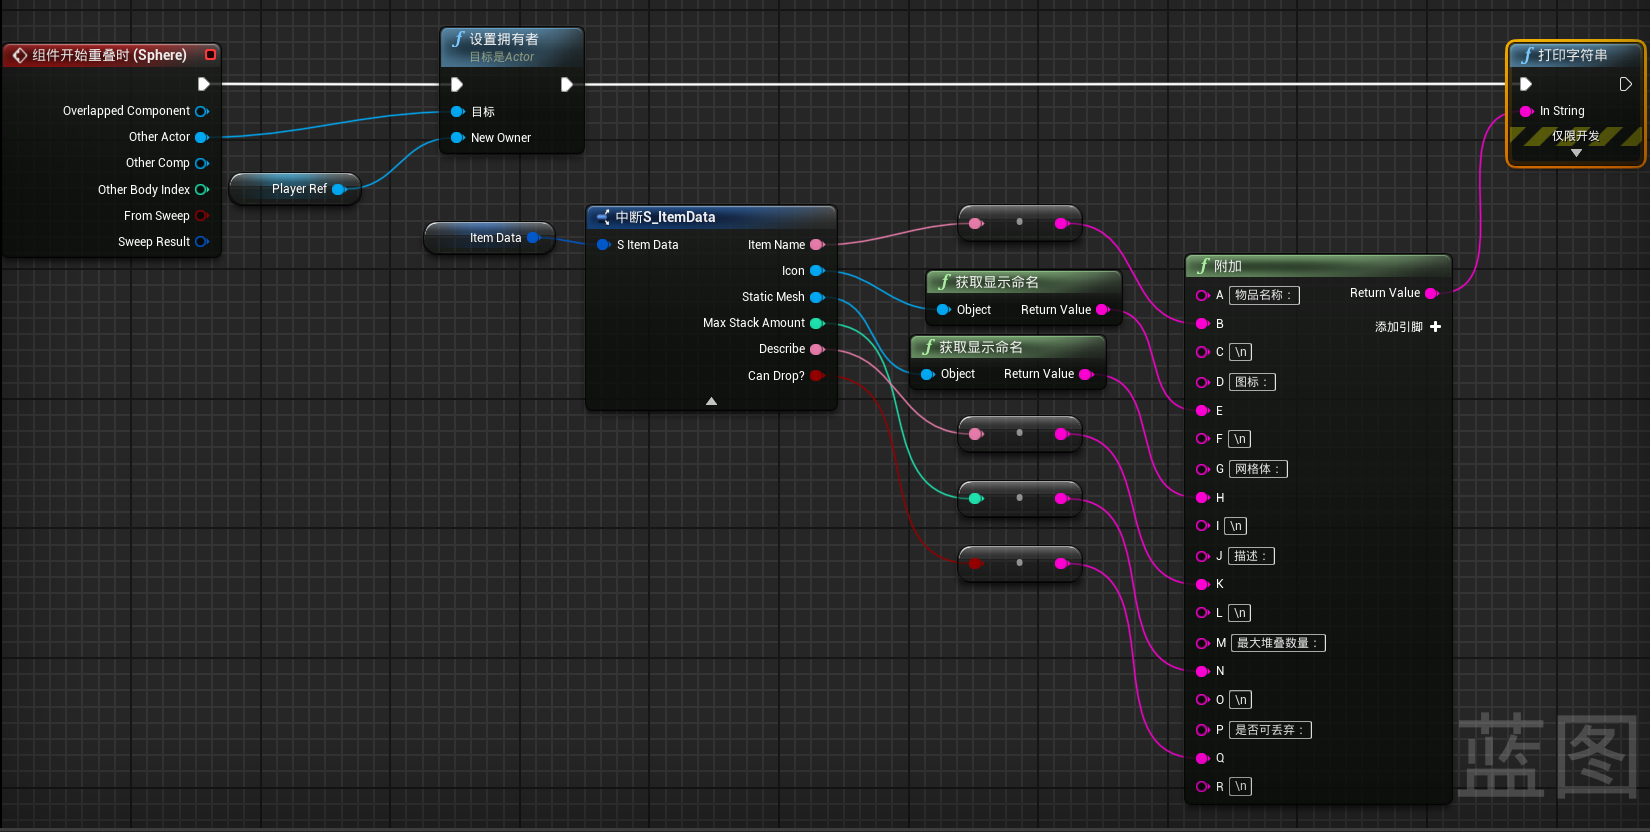
Add Collision Detection
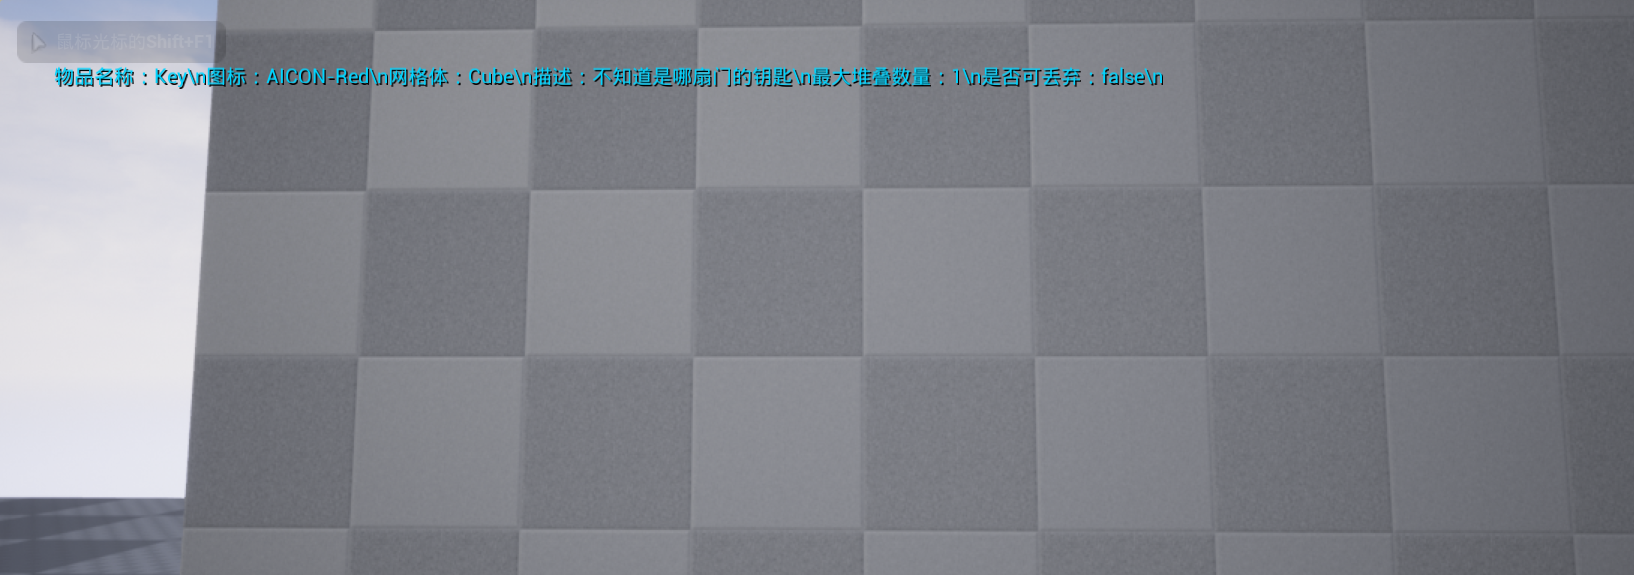
Add sphere collision component, print item info in overlap event to test if data access is successful:
Test Results
Can see model loaded correctly:
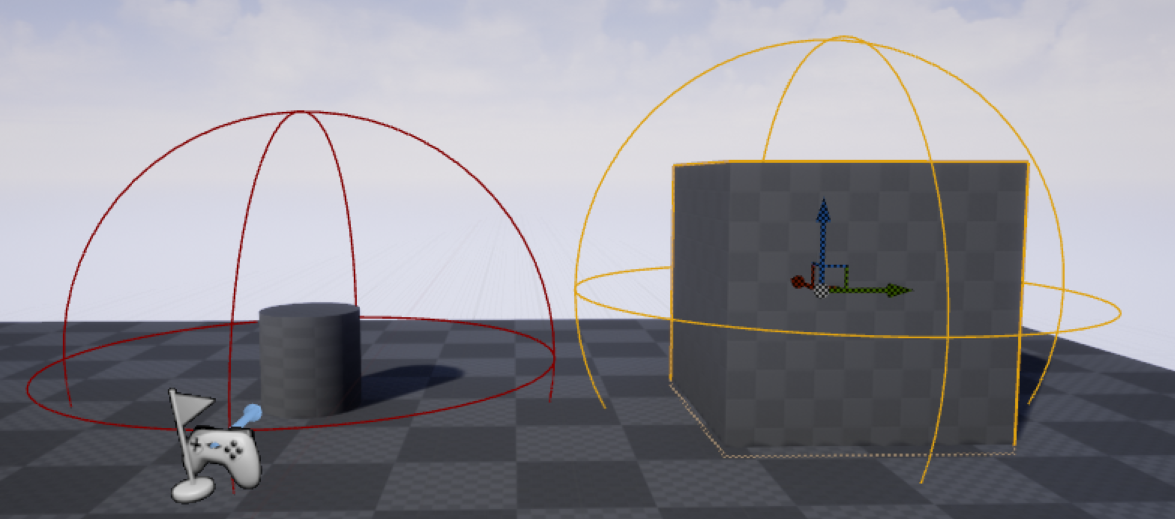
Run test, walking into collision shows item info printed successfully:
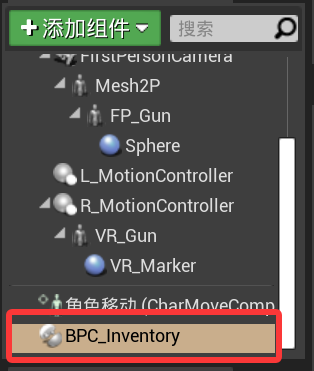
Step 3: Create Inventory Component
Create BPC_Inventory Actor component in Blueprints/Components/ folder.
Add Variables
- InventoryItemData array - Store items in inventory
- SlotAmount (Integer) - Total inventory slots
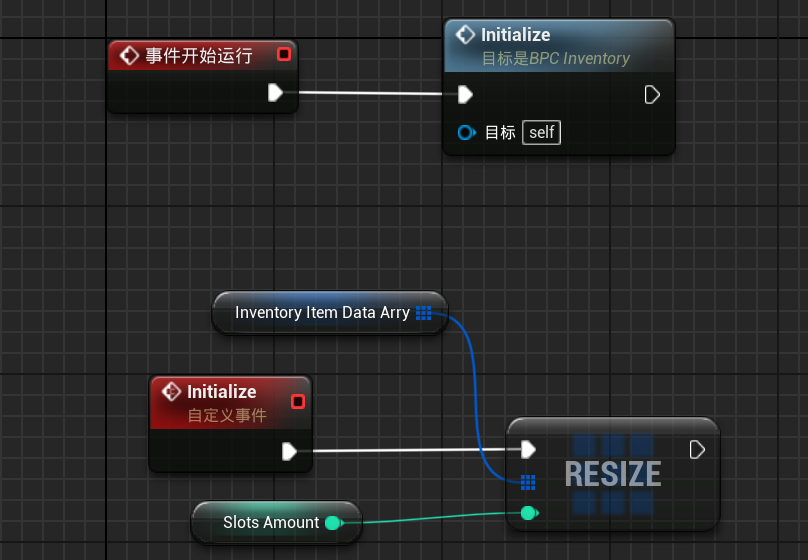
Initialize Event
Create Initialize custom event to initialize inventory space:

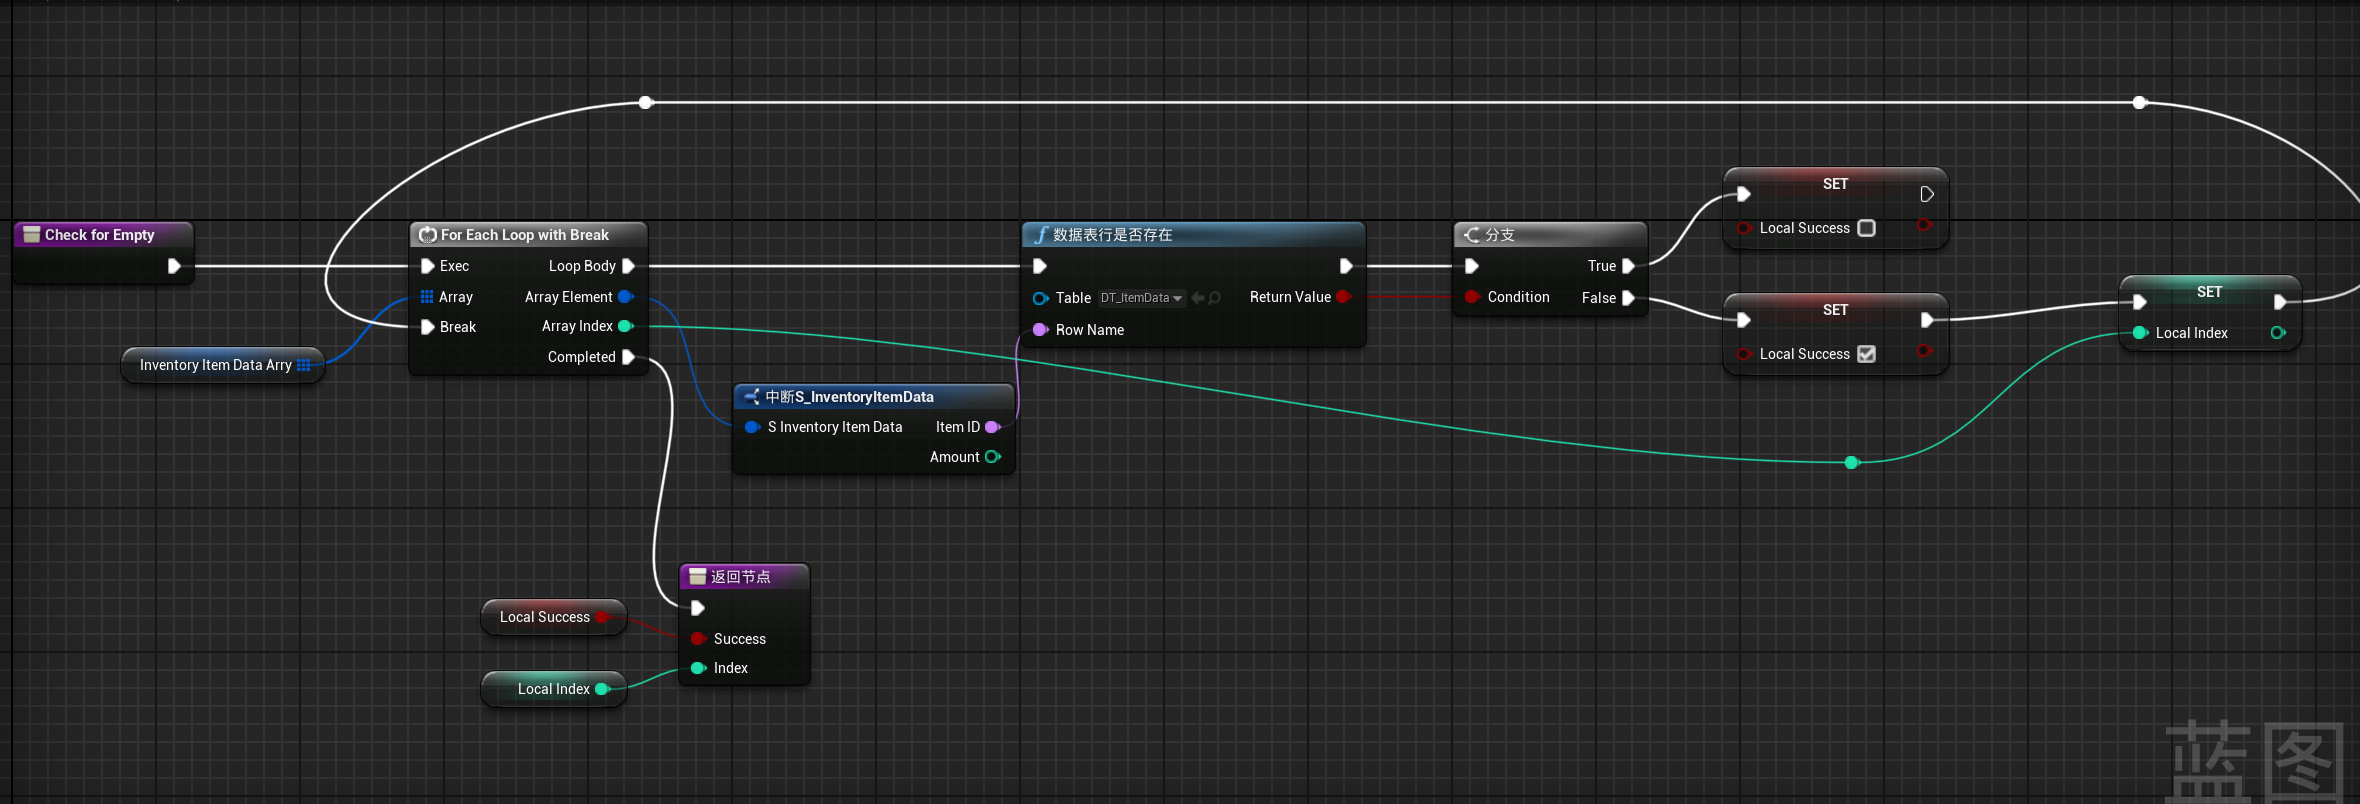
CheckForEmpty Function
Create CheckForEmpty pure function to find empty slots:
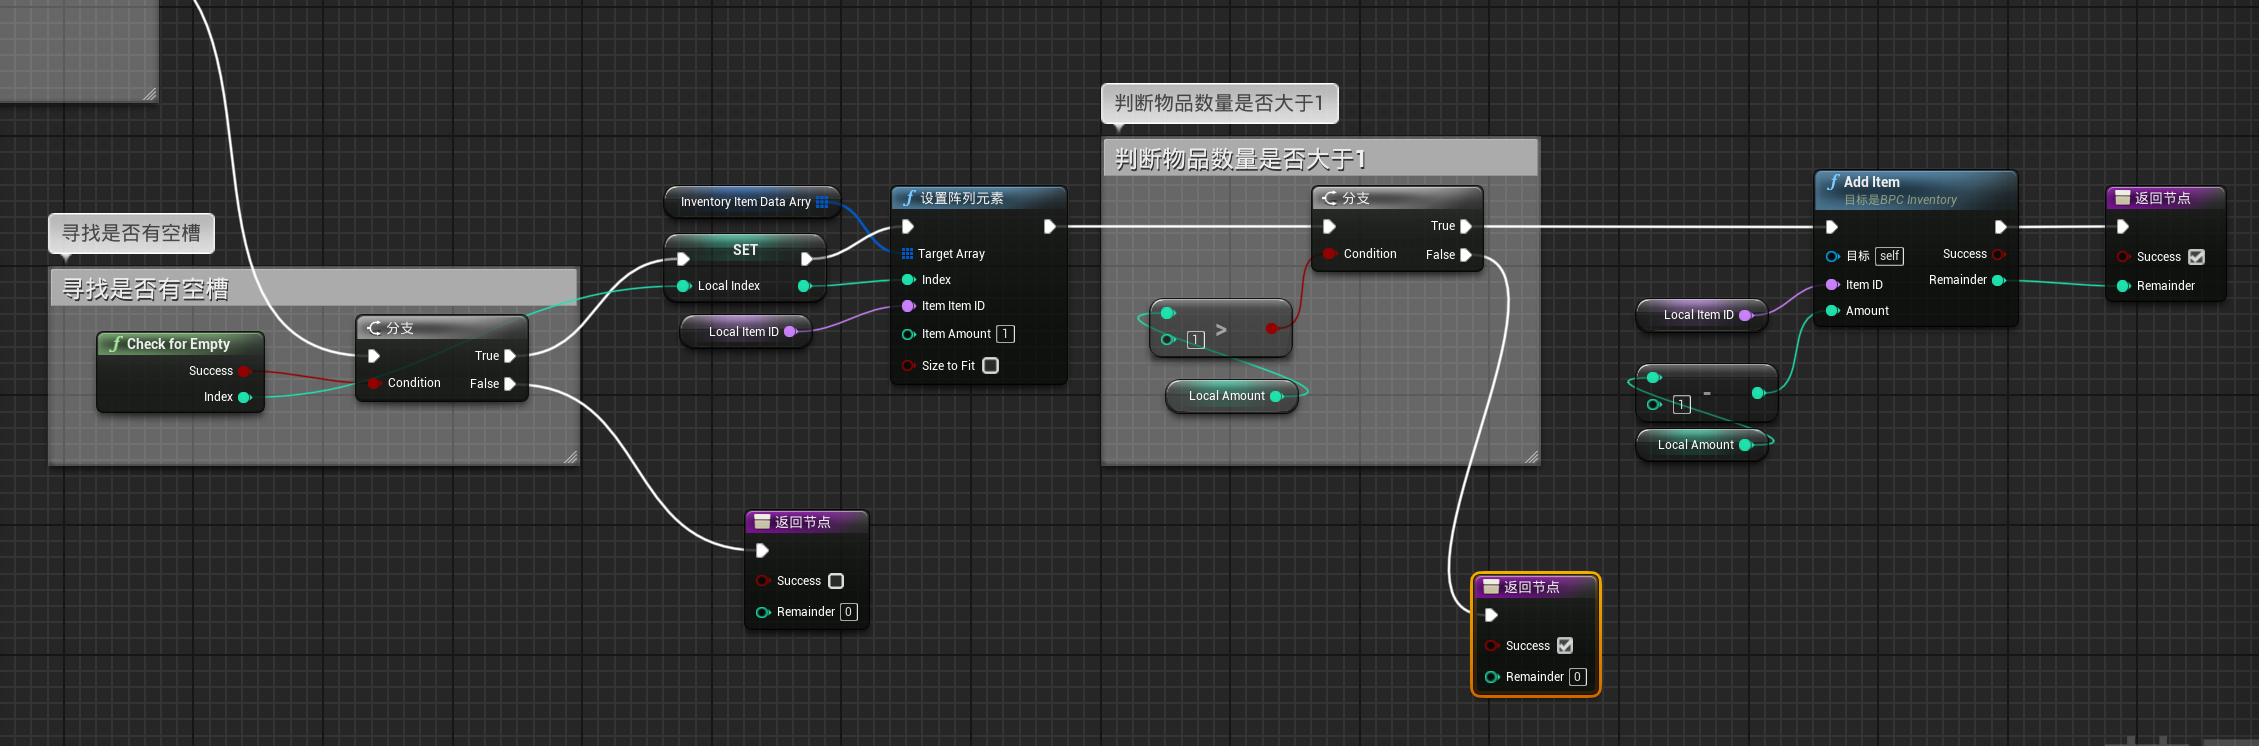
AddItem Function (Basic Version)
First implement simple logic with max stack size of 1:
Inputs:
- ItemID (Name)
- Amount (Integer)
Outputs:
- Success (Boolean)
- Remainder (Integer)
Note: Promote input parameters to local variables to prevent data pollution.
Connect Pickup Logic
Add inventory component to character blueprint, then call AddItem in BP_PickupMaster’s overlap event:
For convenience, change InventoryItemData struct variable to two independent variables:
Test Pickup Function
Add an input in character blueprint (like Tab key) to print inventory contents:

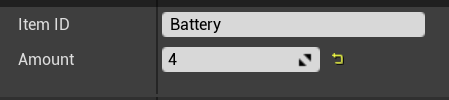
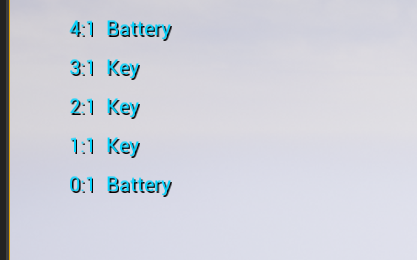
Set test data: Key quantity 3, Battery quantity 4
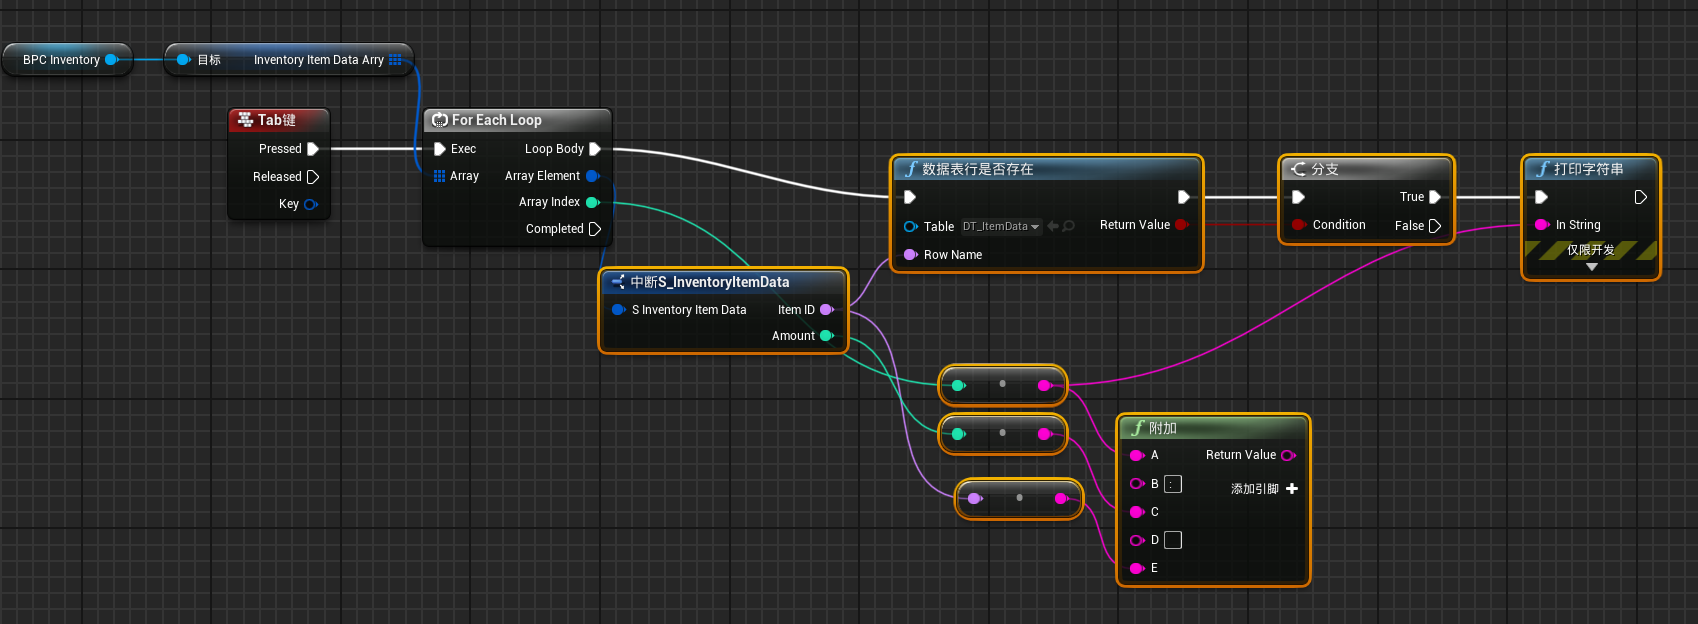
Test result: Items disappear when approached, press Tab to see inventory info
Step 4: Implement Stacking Logic
CheckForFreeSlot Function
Create CheckForFreeSlot pure function to find if there’s a slot with same item:
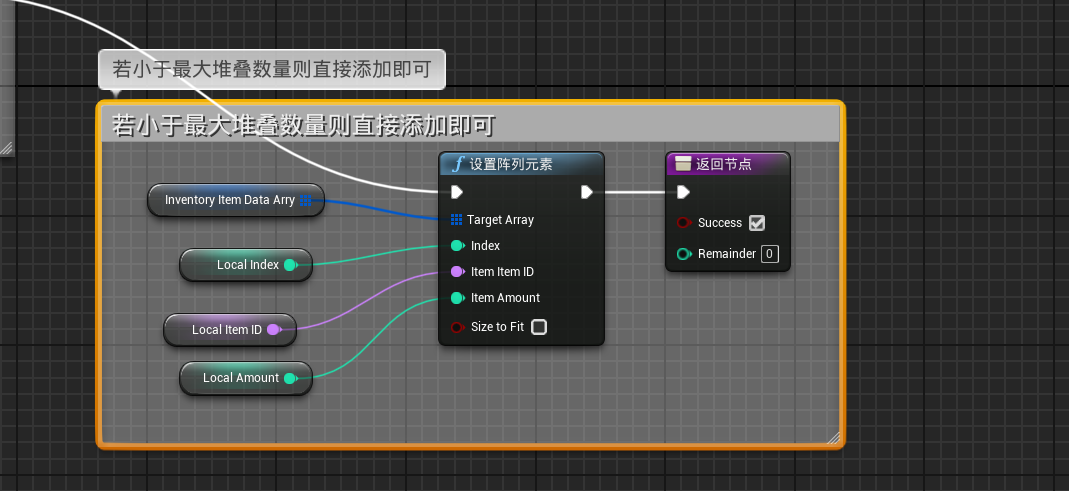
AddItem Function (Complete Version)
Implement complete logic with stacking support:
- Check if there’s a slot with same item
- If yes, check if can stack
- If exceeds max stack, recursively call AddItem
- If no same item slot, find empty slot
- Handle inventory full situation
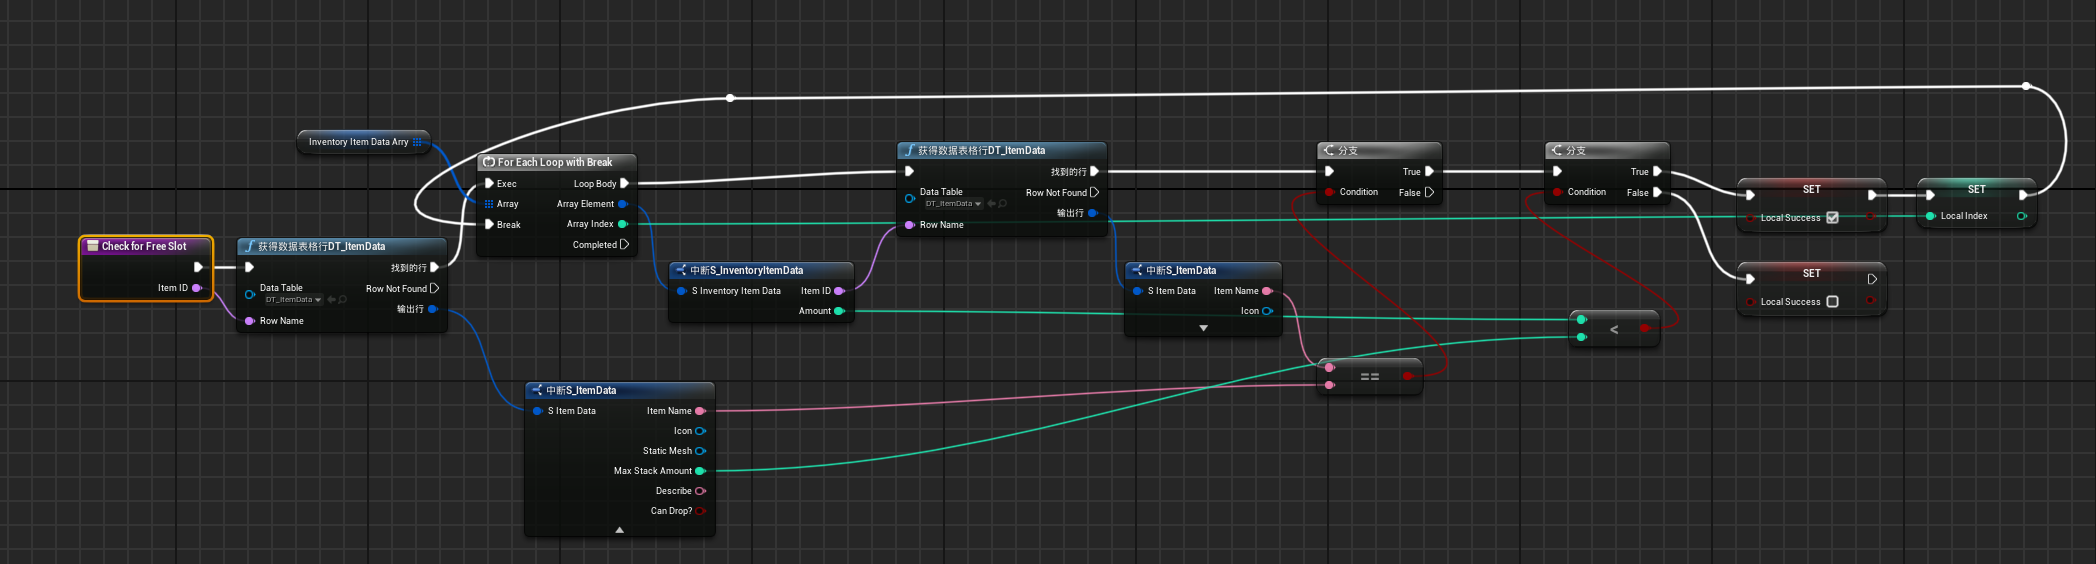
Note: When can’t find empty slot, remember to return current item quantity, otherwise items will be removed even when overflow.
Step 5: Implement Item Dropping
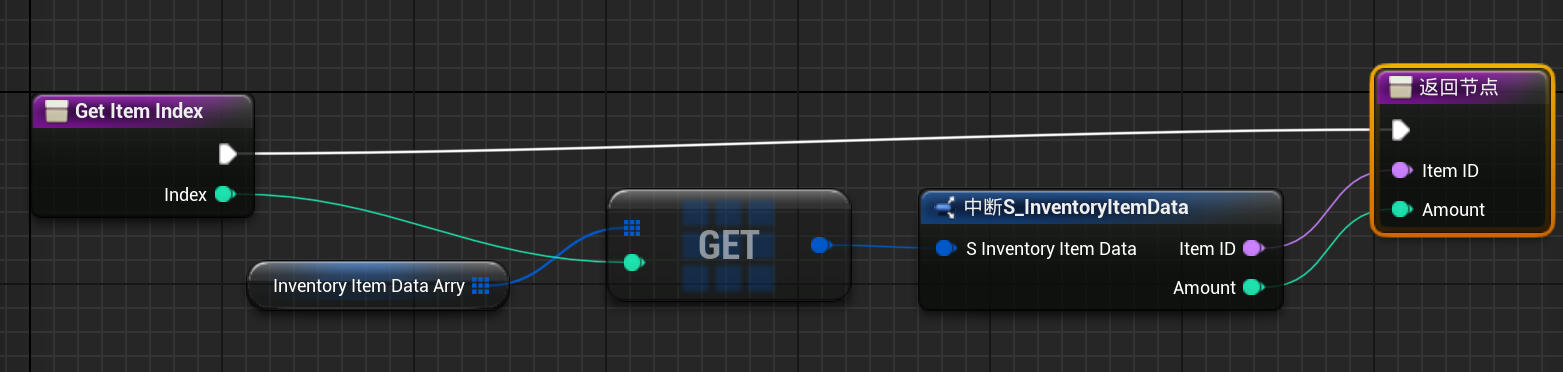
GetItemIndex Function
Create GetItemIndex function to get item info by index:
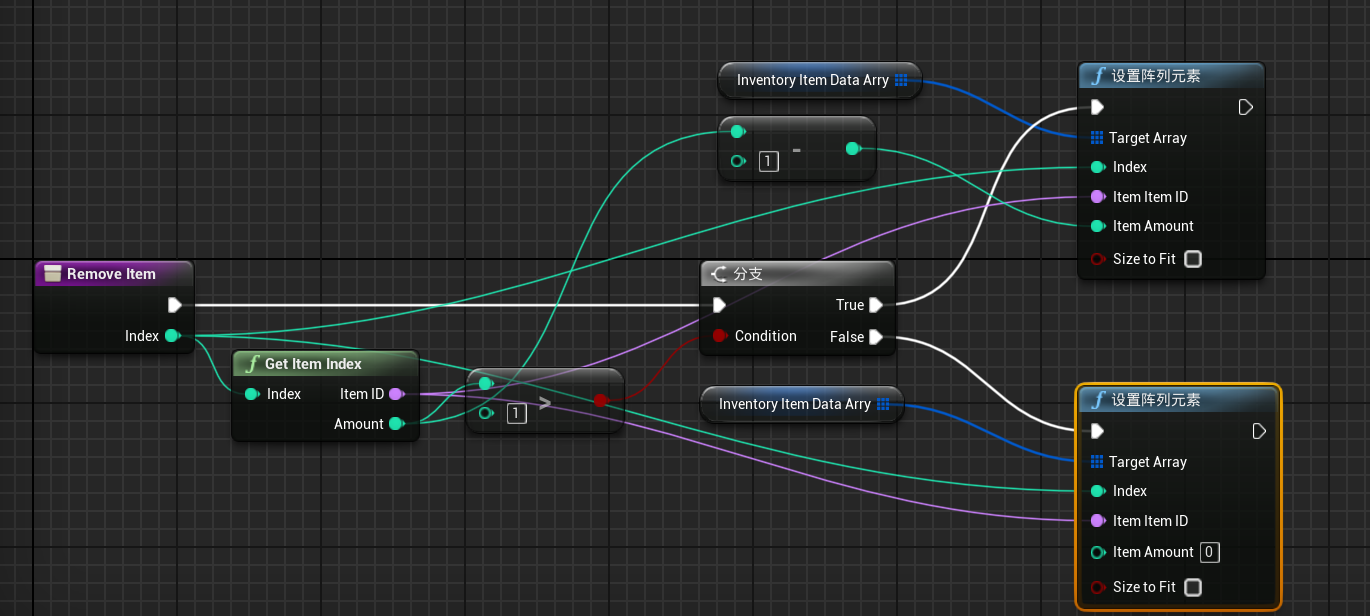
RemoveItem Function
Create RemoveItem function to remove items from inventory:
DropItem Function
Add BP_PickupActorMaster class reference in ItemData struct, then create DropItem function to spawn items on ground:
My Development Insights
The core of this inventory system is data structure design:
- ItemData is static template, storing basic item properties
- InventoryItemData is dynamic instance, recording specific item quantities
- Link them through ItemID, achieving data separation and reuse
Stacking logic is the most complex part, need to consider:
- Does inventory have same item
- Does it exceed max stack size
- How to handle full inventory
- Data passing in recursive calls
Summary
Simply put, an inventory system is a data management system. The key is separating static and dynamic data, organizing with reasonable data structures, then implementing CRUD logic.
References:
- Unreal Engine Official Documentation - Complete UE5 documentation
- Blueprint Visual Scripting - Blueprint system guide