OpenClaw Deployment Guide
Detailed documentation of the complete OpenClaw deployment process on Windows systems, including environment preparation, installation configuration, model setup, and more
1. Environment Preparation
1. Install Node.js
First, open the Node.js official website Portal. Note: Node.js version must be >= 22.16
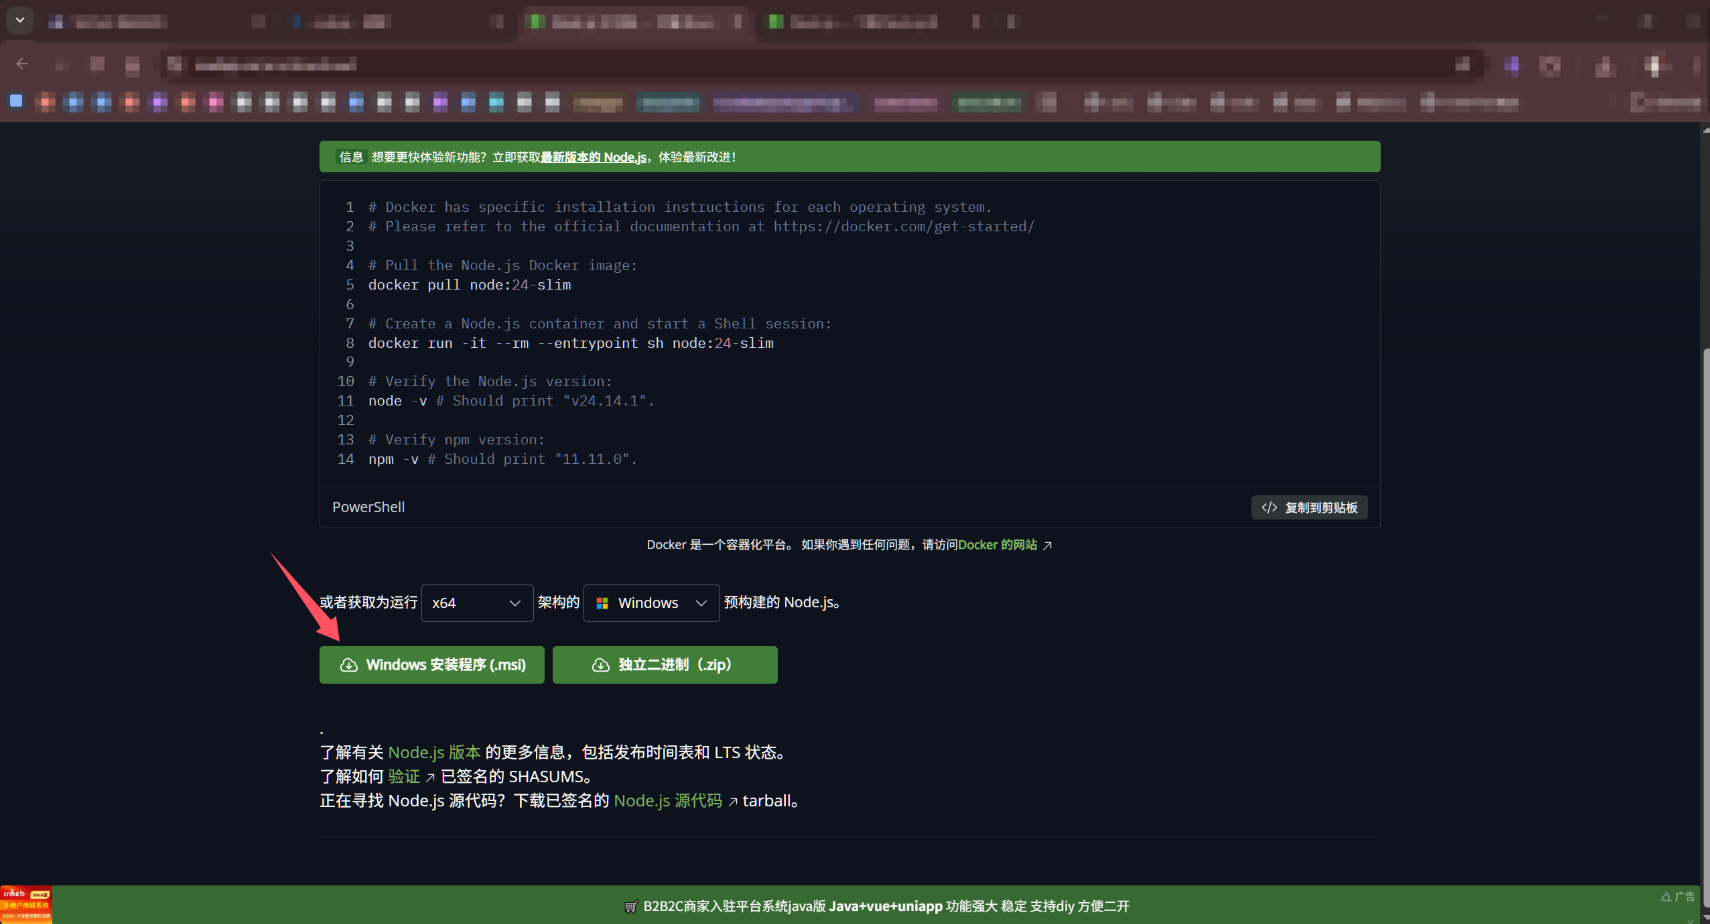
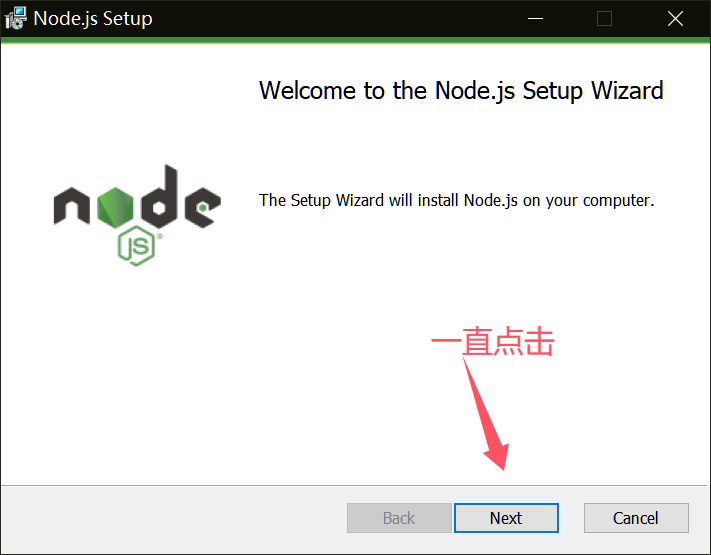
After downloading the msi installer, keep all options default and click next until completion
After installation, open command line window and enter
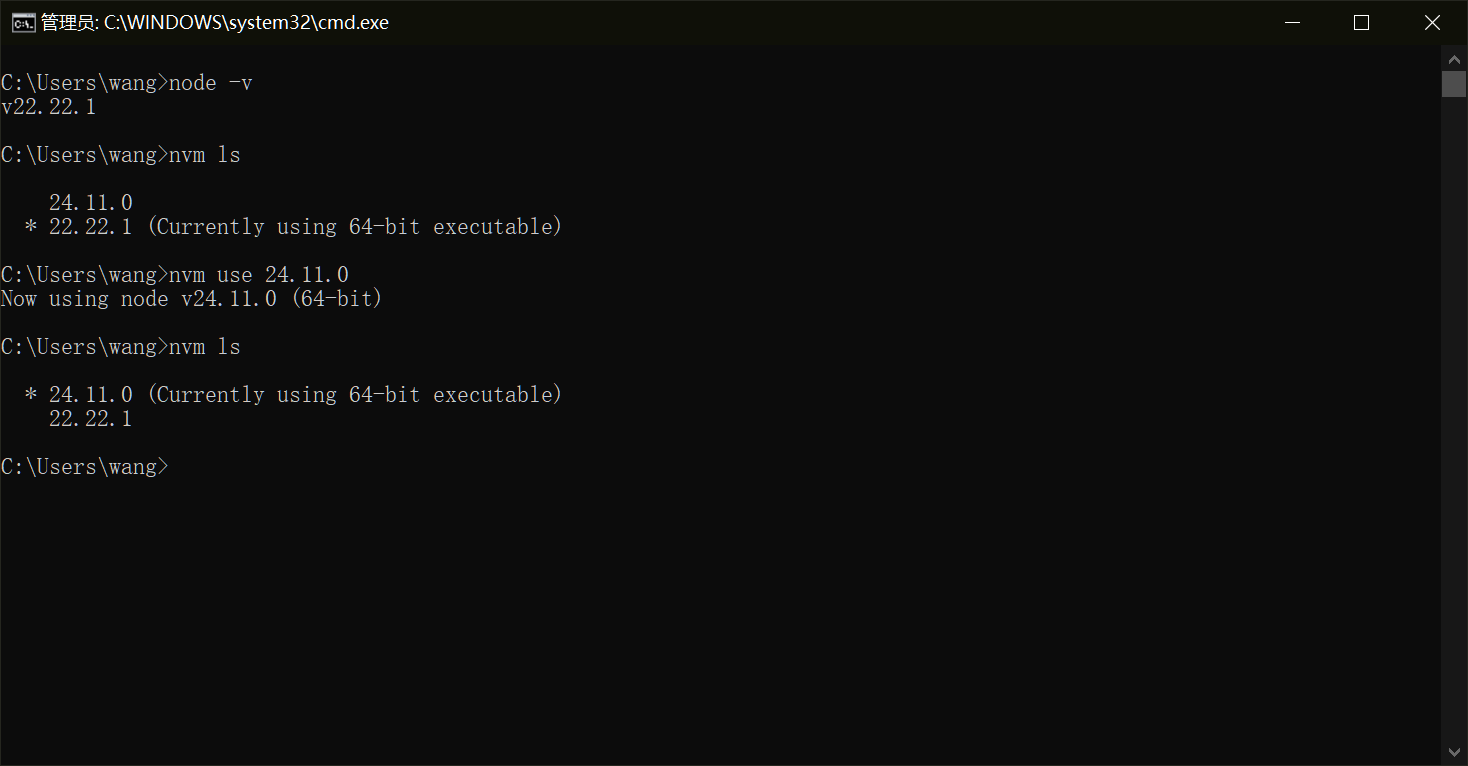
node -vto check if version number is displayedIf the displayed version doesn’t match the installed version or is lower than 22.16, enter
nvm lsin command line to view currently installed versions. If there are multiple versions, runnvm useversion_number to switch versions
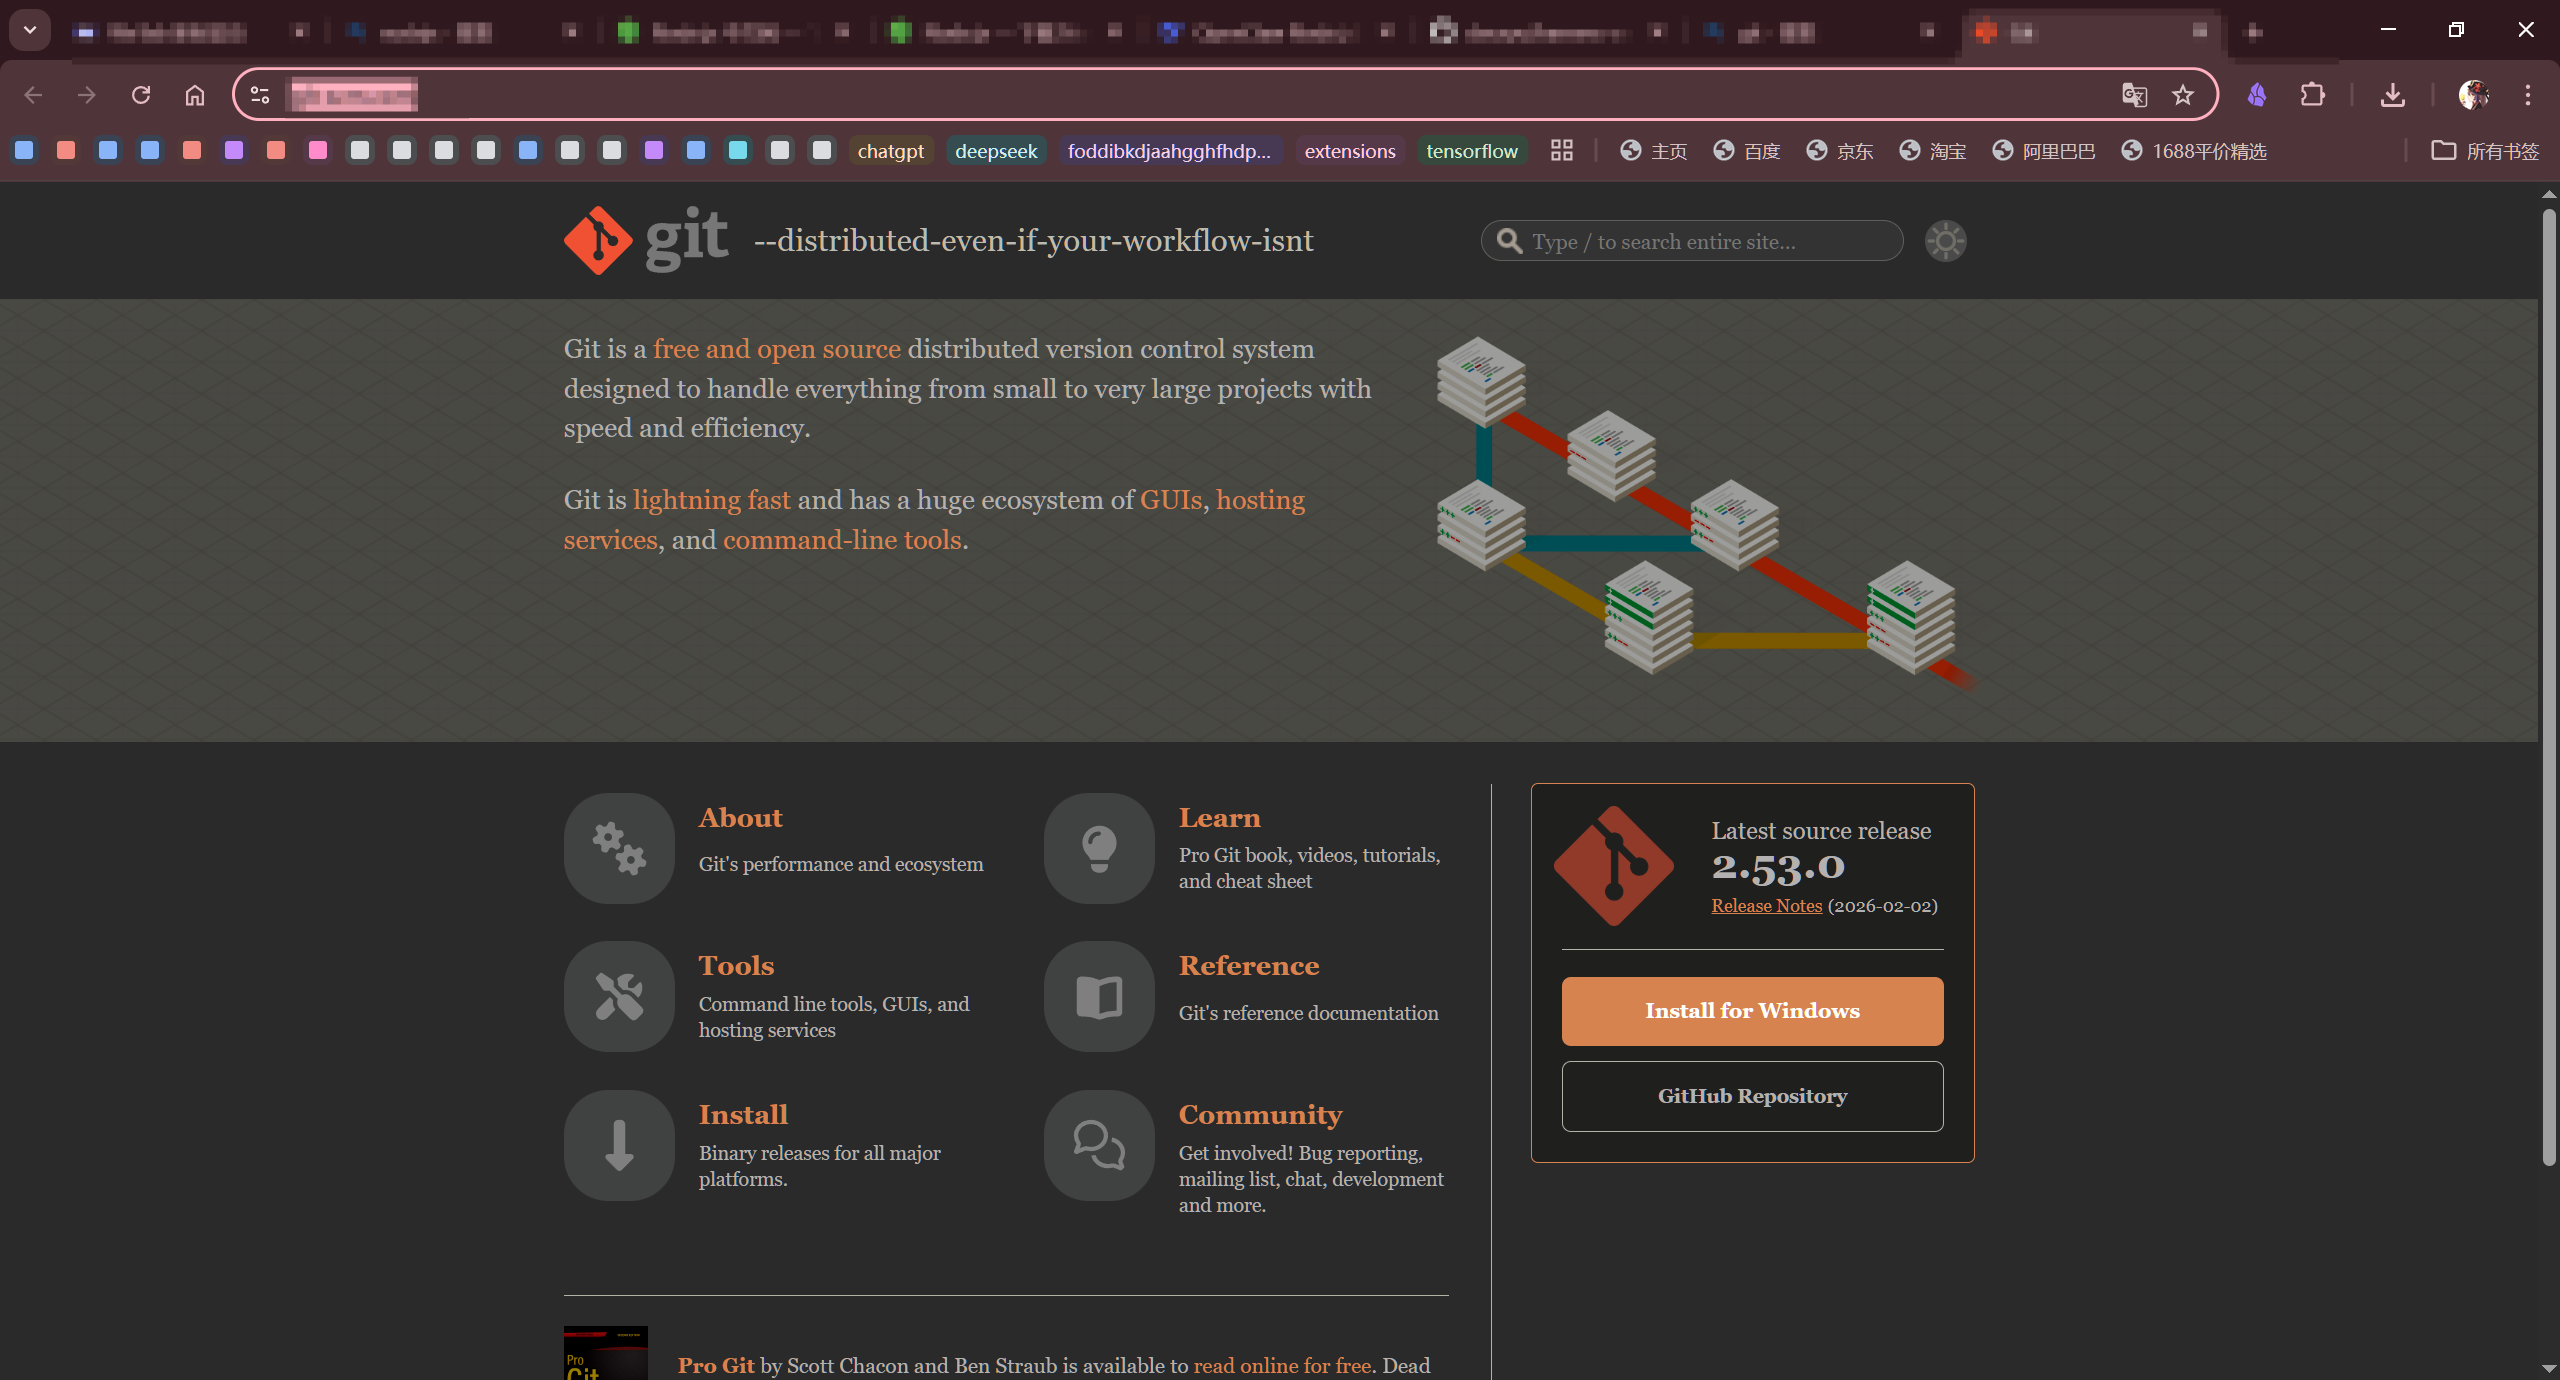
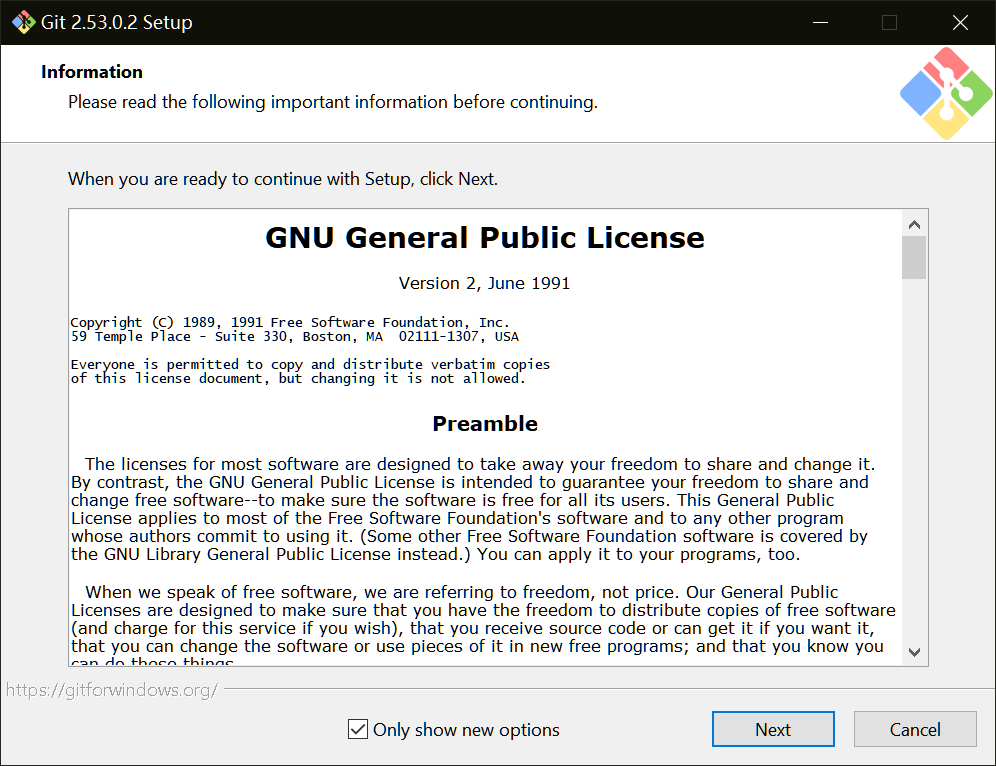
2. Install Git
If git is already installed, you can skip this section. Why do we need to install git?
- Because although we use npm for installation, some core dependencies need to be pulled from GitHub repositories during installation, so git needs to be installed
Open git official website Portal, download Windows version
 Keep clicking next with default settings
 Open command line window and run
 git -vcommand. If version number is displayed, installation was successful
3. Install OpenClaw
Enter
npm i -g openclawin command line (please disable VPN during installation). Installation may take some time, please be patient. You may see some warnings during installation, which is normal. Below is the successful installation promptIf you encounter the following error warning, run
git config --global url."https://github.com/".insteadOf "ssh://git@github.com". This error occurs because npm defaults to using ssh protocol for pulling, but we haven’t configured ssh keys, causing pull failure. This command forces the use of https protocol for pulling, avoiding errorsAfter installation, enter
openclaw -vin command line to check if version is displayed. If yes, installation was successful. If there’s no output but previous steps were fine, it means Node.js environment variables aren’t configuredThis section is about Node.js environment variable configuration. If there were no previous issues, skip this part and go to the next section First check Node.js path. Enter
npm prefix -gin command line, which will output npm installation path. Copy this pathThen press win+s and search for environment variables
Create a new user variable with variable name Path and variable value as the path you just copied
Then reopen command line window and enter
openclaw -v. You can see the version number is successfully displayed

2. OpenClaw Configuration
1. Initial Configuration
Enter
openclaw onboardin command line window. A risk warning will appear, select yesConsidering some people may have concerns about this security warning, here’s the translation:
**Security Warning — Please Read**
OpenClaw is a hobby project still in testing phase. Please be prepared to encounter various issues.
By default, OpenClaw is a **personal assistant** with security boundaries based on "only one trusted operator." If tools are enabled, this bot can read your files and perform operations. A carefully crafted malicious prompt could potentially trick it into unsafe behavior.
OpenClaw **is not by default a security boundary that can resist malicious multi-tenant attacks**. If multiple users can send messages to a tool-enabled bot, they collectively have the **tool operation permissions** granted to that bot.
**If you're not familiar with security hardening and access control, please do not run OpenClaw.**Please seek help from experienced people before enabling tools or exposing OpenClaw to the internet.
**Recommended minimum security baseline:**
- **Pairing/Whitelist + Mention Restrictions**: Only allow specific users or trigger it by @mentioning the bot in messages.
- **Multi-user/Shared Inbox**: Must split trust boundaries (e.g., use independent gateways/credentials, preferably independent OS users/hosts).
- **Sandbox Environment + Principle of Least Privilege**: Provide isolated environment for tool execution and grant only minimum necessary permissions.
- **Shared Inbox**: Must isolate private chat sessions (set `session.dmScope: per-channel-peer`) and keep tool permissions at minimum level.
- **Isolate Sensitive Information**: Ensure various keys, passwords and other sensitive information are not placed in file system paths accessible to the agent.
- **Use Strongest Model**: For any bot with tools enabled or receiving untrusted inbox messages, use the currently most capable and secure large language model.
**Regularly run the following commands for security checks:**
bash
openclaw security audit --deepopenclaw security audit --fix
**Must-read documentation:** [https://docs.openclaw.ai/gateway/security](https://docs.openclaw.ai/gateway/security)Then select quick start and press enter. This tutorial only explains how to quickly configure openclaw on Windows; custom configuration will not be covered
Then the LLM configuration interface will appear. I recommend using Deepseek because it’s cheap and API key is easy to obtain
First find Deepseek official website, after logging in select API development platform
Select recharge, you can try recharging 1 yuan first
After recharging, click API keys and create a new API key with any name
After creation, an API key will be generated. Be sure to copy and save it to your notepad or elsewhere, as the API key is only displayed once
Now we have the API key. Return to command window and select Deepseek provider
Paste the API key we just copied and press enter
Then select model, choose default as it can be changed later
Then control channels will appear, which can control openclaw to search information and modify code on the computer. This can be configured later, so we can skip it
This is internet provider configuration, which determines where AI will search when asking questions. This can also be configured later, so skip it
Then skill configuration, we also select no and skip
Also skip hooks, press spacebar once and enter
When this window appears, startup was successful
Next, enter
openclaw dashboardin command line window to open openclaw’s web UI interfaceAsk any question and you can see configuration was successful

Configuration is now complete!